I have often seen folks spend lots of time (and oodles of money) selecting a backpack in a camping store. Almost inevitably they end up with something very heavy and very uncomfortable (for a long walk) and have spent so much money they are going to just go with it – and suffer! But, as they say, ‘There is another way!’
(Aside) Some time back I posted about some cheap backpacks I bought from Amazon dot com (before it became difficult to get stuff from them in Australia – thanks Malcolm). Their offerings at dot com dot au have improved. You should check them out – cheapest source of Keen shoes, for example. Recently Della bought four (!) beautiful purple 500 gram 40 litre backpacks for $10.90 ea delivered from the dot au site – so they are still out there. (Amazon apparently made a mistake with the pricing and they are now A$31.99 ea!) You should also trawl through Aliexpress’ cheap backpacks. They have some beauties. More about that later when I have my hands on some of them!
These Amazon packs work out very well with a few mods and will be fine for us for short-ish trips at least. It occurs to me that I could replace the back pocket with a larger one (sans zipper) and add an 8-10 litre extension collar to make them serve for a trip of a week or more though. So…you don’t need to spend all that money. Maybe hundreds of dollars on a backpack. Around 50-55 litres will be good for a week or ten days, hiking the South Coast Track, Tasmania (here and here) – or the Dusky in New Zealand, for example.
The lightest of my Amazon packs works out at 350 grams with a waist belt, a pad holder and a couple of other gee-gaws added, which is not too bad. I suspect a 4.8 oz/yd2 Dyneema backpack (or similar material) @ 50 litres ought to be able to come in pretty close to sub 300 grams, (certainly under 400) but it is a lot of sewing to start from scratch (my next pack project). However I do have 2-3 Dyneema packs I might modify first. See below. I have a wholly new suspension system in mind, for example. Food for a future post.
Ray and Jenny Jardine ‘s DIY backpack weighs 270 grams (for comparison) and is 60 litres – so that gives you some idea of just how far wrong most manufacturers are!) They have hiked all the main US trails with theirs – several times! And with a shelter which weighs around a quarter of a kg (for two!) I might add!
Belts
You only need an approx 1″ (2.5cm) waist belt to pull the pack in to the small of your back. Mine is 1″ grossgrain ribbon. It weighs 12 grams (including the buckle) and is quite adequate for the job. I could even shorten it and save a gram or two. It does not need to be any stronger or wider than this. Most sewn on belts are attached so that they will not do up around your waist. They come from the sides of your pack – you can slip your arm down either side of them. One I own weighs 250 grams (just the hip belt!) Probably more than the whole pack needs to weigh. You need to overtighten the (too wide) bulky hip belt to get any effect at all from it – and it will often pull your trousers down because it is too low (or the pack is not high enough up your body – whichever way you look at it). If you look at the photo below you will see mine is attached to the centre back of the pack so that when you tighten it, it tightens up all around your waist.
To continue: There are all kinds of gimmicks to ‘transfer the load’ (allegedly) to your hips. Frames, tension adjusters, hip belts etc. None of these should be necessary and most are undesirable (I will explain). If the load does not sit in the small of your back and balance on your bum naturally, then your backpack doesn’t fit (likely) or is poorly designed (very likely). In which case all these gimmicks are just trying to force a square peg to fit in a round hole. And will likely try to bend your back the wrong way and make it sore.
I have written about fitting your backpack before but I have made some further discoveries…
Measuring
Here are Rei dot com’s (and lots of other people’s) instructions for finding your ‘torso length’ (You have to start somewhere):
‘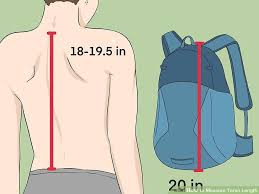
- Tilt your head forward and feel for the bony bump where the slope of your shoulders meets your neck. This is your 7th cervical (or C7) vertebra—and the top of your torso length.
- On each side of your body, slide your hands down the ribcage to the top of your hip bones (aka the iliac crest). With index fingers pointing forward and thumbs pointing backward, draw an imaginary line between your thumbs. This spot on your lumbar is the bottom of your torso measurement.
- Stand up straight and have your friend measure the distance between the C7 and the imaginary line between your thumbs. That’s your torso length.
I find that this system overcalculates the most desirable length slightly because it goes past your waist (see picture) and the shoulder strap do not naturally hang at the point shown but slightly lower down your back. You may be better off with a pack that is 1-2″ (2-5cm) shorter – but definitely not longer! If it is longer it will want to straighten your back (destroy the lordosis!) and cause you pain.
Here is Ray Jardine’s ‘take’ on this problem (which I think is very true):
“Why not use a frame and hip belt?
As you hike along a trail, your shoulders, spine, and hips twist, or rotate, in opposition to each-other.
As you take a step, your right shoulder moves forward, and so does your left hip. At the same time, your left shoulder and right hip moves backward. Then as you take the next step, everything reverses. It’s like doing the twist. This twisting motion is the natural bio-mechanics of walking, evolved over the millennium, and it saves a tremendous amount of energy.
The Ray-Way Backpack does not inhibit this bio-mechanical motion of the shoulders, spine, and hips, because the backpack does not reach the hips. It sits above the hips. So while carrying Ray-Way Backpack you walk free, as nature intended. And this translates to a more efficient style of hiking with less effort and less fatigue.
A backpack with a hip-belt is longer, and reaches the hips. And this alone interferes with the twisting motion. And when you fasten the buckle, the hip-belt pretty much stops the twisting motion altogether.
This is only one example of why the majority of highly-touted features on most backpacks actually work against a person. They add weight, and of course expense. Contrary to hype, most of those features are designed for marketing rather than hiking.
With a light to moderate load, we find the hip-belt unnecessary. And of course we do not normally recommend hiking with a heavy load.”
Lordosis
The most important thing to remember (about backs) is ‘Remember (and preserve) the lordosis’. The lordosis is the frontwards curve of the spine, (‘the small of the back’ as we used to call it). It exists for a reason. If your backpack is balanced properly it should want to swing straight into this sweet spot.
Put some stuff in your backpack then put one arm through both the straps and hold your arm straight out. The backpack should swing forwards under your arm so that it would rest perfectly in the small of your back and be supported by your bum (not your hips). If the pack is tapered (wider at the bottom) it will likely do this. Some packs are too straight to do this and will never be comfortable. Others have curved side panels (Like MLD’s or this one) so they do it perfectly.
Here is Della modelling one of these <US$20 backpacks. It appears she is wearing it a bit low in (the angle of) the photo but if you notice that her Waist Belt goes around her waist (not her hips) , pulling the backpack in to the small of her back, thus sitting the weight of the pack on her bum, then you will realise that it is fitted just about exactly right. This belt does not need to be tight. None of the belts ought to be tight.

BTW: This 1-2 gram pad attachment system works well

Incidentally the excellent Gossamer Gear Air Flow Sitlight Pad (US$24 Oct 2019) works well with the above pad attachment, and ensures (most times) a dry back on the trail. Get the one that is short enough for you! Ours are the Size = Small at 17″ long.

Here is another DIY method of creating a dry back: https://www.theultralighthiker.com/2017/08/20/diy-dry-back-hiking-pack/

Ideally you shouldn’t need any straps other than the shoulder straps. These should be curved slightly rather than straight (in an ‘S’ shape) so that they sit comfortably and do not slide off. The chest strap is really just to keep the shoulder straps from sliding off, but if it inclined to it probably means that the pack or the straps are wrong and/or you have too much weight on your shoulders (unsupported by your bum) or just too much weight altogether. If your pack is over 10 kg including food at the start of a 10 day (unsupported) hike you are almost certainly carrying too much anyway – and should read through some of my posts about how to lighten your load.
If you try putting on your backpack (providing it is the right length – the one you already own is probably too long) so that it sits comfortably in the small of your back (and providing you only have a modest weight in it – say 6-7 kg – which should be enough for a trip of several days in moderate ie above zero weather) then your back pack should be most comfortable with only the shoulder straps done up and should swing gently from side to side as you walk, keeping up with the natural rhythm of your gait so that it does not interfere or obstruct it, which hip belts (especially) and even waist belts (and chest belts) do. They make you have to use more energy to simply get along. A waste of effort, and uncomfortable to boot!
A Note About Closures
Roll-top closure which you might modify if you don’t like them (I don’t) – they do reduce the storage of the pack (compared with the simple draw string of the original) but their intention (along with the side compression) is to ensure that the contents exactly fill the volume of the pack so that you don’t need a frame. The contents of the pack are the frame. I would prefer to have 2-3 draw strings going down so that you could shrink the pack to achieve this ‘frame effect’ but without reducing its volume when full. This would also be (fractionally) lighter, but people obviously prefer all the bells and whistles that modern packs offer. I also think Joe Valesko’s method of tightening the draw string downwards by passing it through a loop at the base of the pack is genius.
Extension Collars
This is a mod I will be adding to the Amazon packs we used on the EBC. They lack an extension collar altogether. I will be able to increase their volume (eg up from 42 to 50 litres) by adding this small rectangle of material. A few minutes work at most. Around 6″ height of extension collar will add 6-8 litres of volume to most packs. At about 1-1.5oz/ yd2 it will only add 5-10 grams to the pack (eg 5 grams in silnylon or closer to 10 grams eg in 3.5 oz/yd2 Dyneema) but make them more suitable for multi-day trips. 8 litres of dry food is quite a lot. The Polo I wrote about here will weigh less than 350 grams at approx 50 litres. The Air Flow Sit Light pad will add about another 100 grams to that.
Mods
Here I have added a 6″ extension collar to the sub $20 pack I took to Everest. It will add 6-8 litres to its volume. Note the 12 gram waist belt and the clothes line. The extension collar folds down inside the pack out of the way when not in use. In this case the lid still closes over the full extension collar.
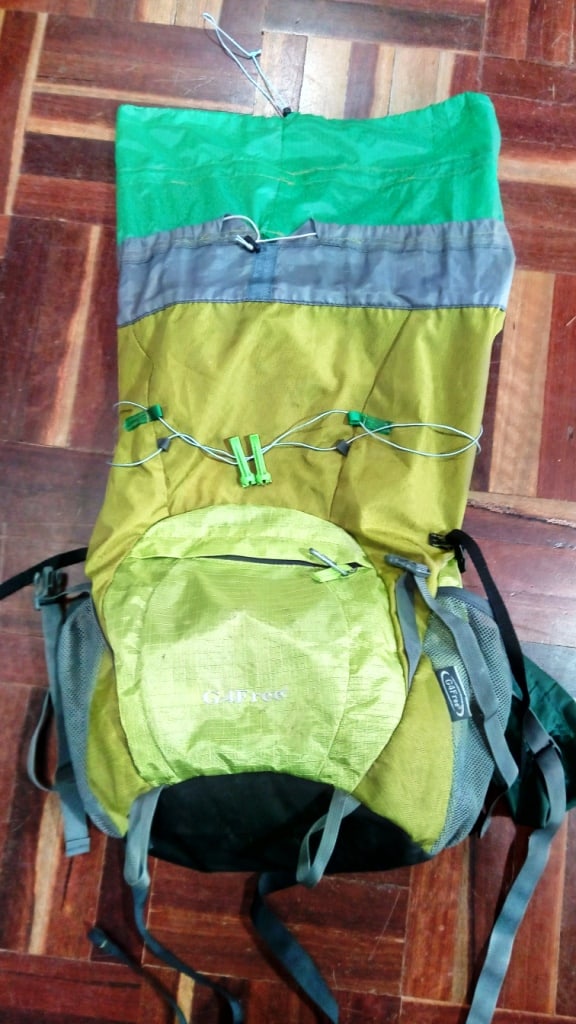
This is my old Zpacks Blast backpack which has been everywhere with me for years. The length has always been a little long for me. It also has two Dyneema pad holders which give one a sweaty back. They also weighed over 30 grams.
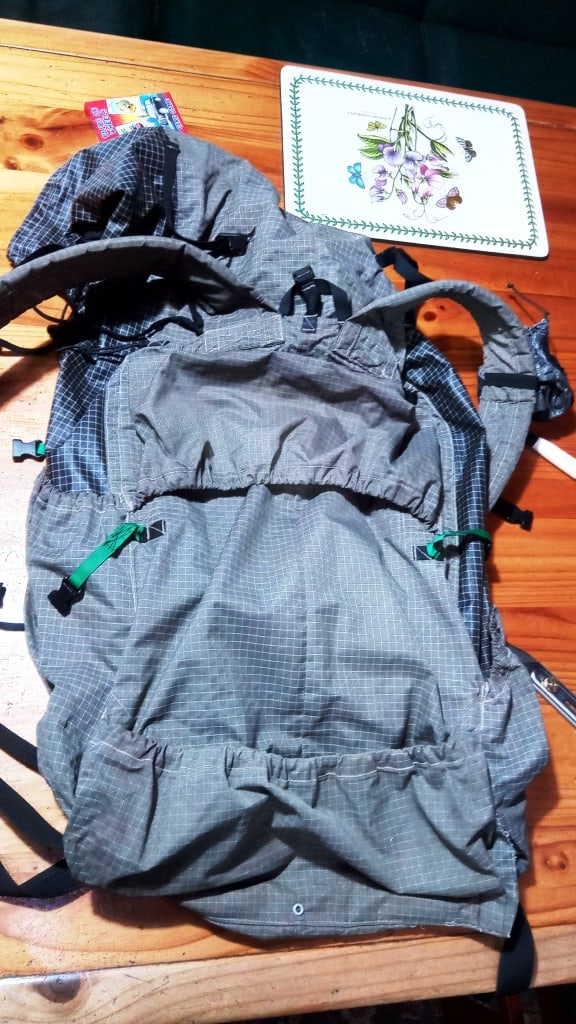
It took a while to do all the careful unpicking.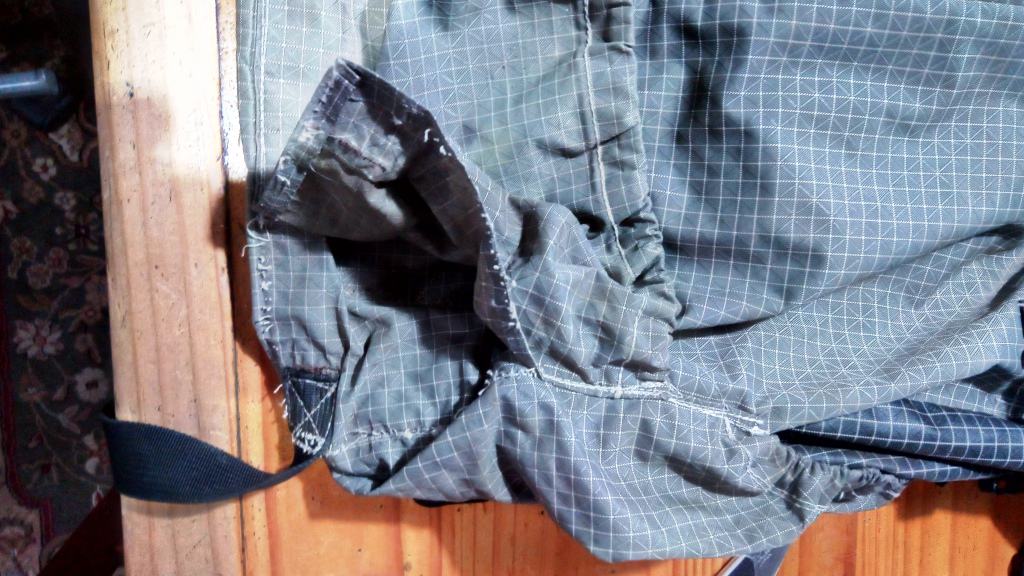
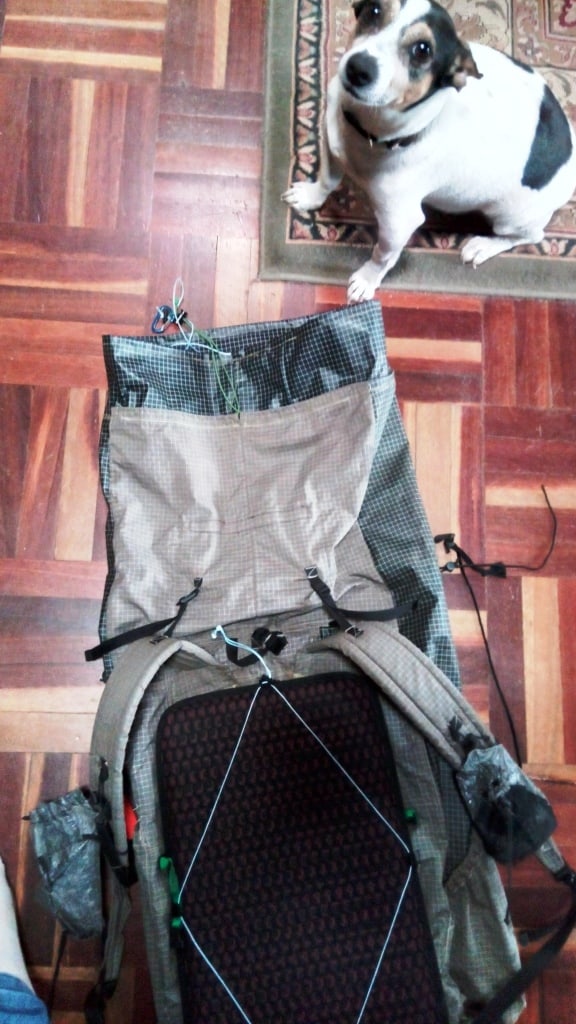
But I moved the shoulder straps down approx 2″ and replaced the pad sleeves with a couple of grams of string. Now I will have a dry back – and a lighter pack. Note the ultralight waist belt.
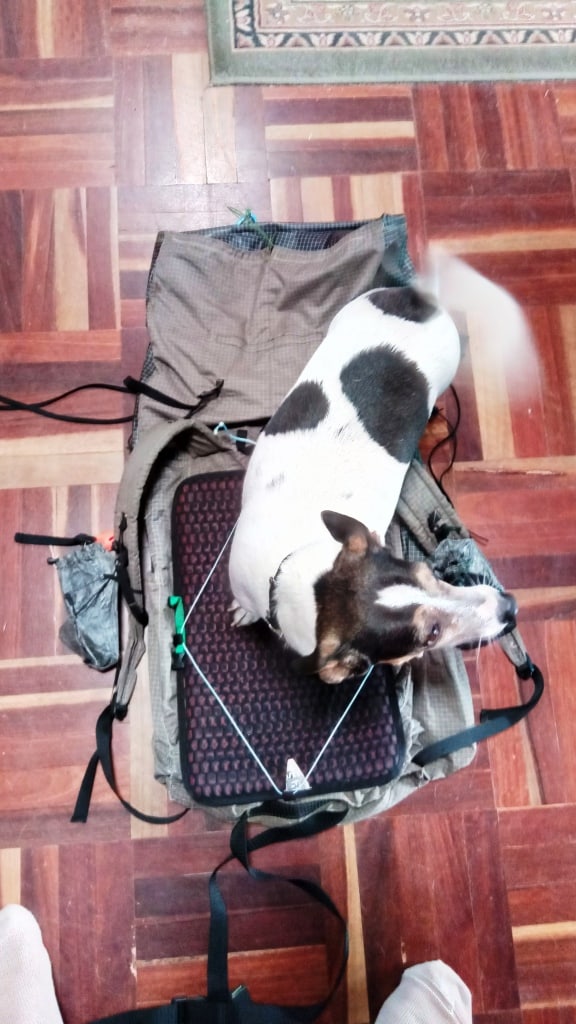
I also added a 5″ extension collar which will add about 7 litres to the pack (taking it to 60 litres). That was all the matching material I had. The pack still weighs under 400 grams! And is much more comfortable.
Lids
The waterproof zip compartment will probably attract a lot of people, but I would have put this compartment’s entry inside the pack (because I just don’t trust zippers at all; when they go where are you?) – and if you really want waterproof, go for Sea to Summit Ultrasil liner bags or Aloksaks.
Pockets
I like an asymmetric sizing of the side pockets – one can carry your shelter, which is a good idea. I long ago modified all my packs for this purpose. Usually you only need to add a light strap less than 5 grams to achieve this. I run an ultralight carabiner through the draw string of the tent and this strap so you never lose your tent!
My wife likes pockets. I would prefer a ring of small pockets heading downwards inside the pack from the extension collar join for quick access to small things on the trail if you can’t cope with having a multi-compartmented drawstring ‘possibles’ bag at the top of your pack inside the liner bag (where nothing gets wet). Frankly this is a much better idea. You can build too many ‘gimmicks‘ into a pack. Keeping it simple is best.
I do not like the stretchy material in the back pocket (though it is a lot more robust than that used by most hiking pack manufacturers). I would prefer a solid material here. I know the intention is to dry socks in the pocket (which does not work well under compression anyway). You are much better to add a clothesline to the pack and peg your washing to that.
The stretchy material tears (especially) in blackberry patches and you then have to worry about losing the pocket’s contents (or attempting a trail repair). I own several packs with torn stretchy material pockets awaiting ‘repair’. The difficulty is that the material is almost always caught up in the seam so that a very elaborate unpicking and resewing is necessary. Might as well just about make a new pack.
Shoulder Straps
The shoulder straps on Gossamer Gear’s new (Robic) line of packs all seem to be about ¾” narrower than on the old G4s, Mariposas etc though they are softer and lined with a wicking material. In general though I think narrower is a backwards step even though they are now better shaped than they once were. The greater the ‘bearing’ surface area, the easier it will be to carry the pack. I would extend this bearing area rather than reduce it. I would add ‘bearing area’ onto the shoulder straps and onto the back of the neck area and maybe onto the pectorals. Much like a horse collar before which invention horses could not pull heavy weights without strangling themselves!
I would have made the straps wider even though the pack is only intended for relatively light loads (well under 15 kg). If the straps are wider and the pack only carries under 10 kg, then I think you can dispense with the chest and waist/hip straps altogether as they only impede walking anyway – and add weight.
See Also:
https://www.theultralighthiker.com/2018/02/17/ultralight-ultracheap-backpack/
https://www.theultralighthiker.com/2018/03/24/budget-pack-mods/
https://www.theultralighthiker.com/2016/05/30/fitting-your-backpack/
https://www.theultralighthiker.com/2018/01/25/gossamer-gear-air-flow-sitlight-camp-seat/
https://www.theultralighthiker.com/2017/08/20/diy-dry-back-hiking-pack/
https://www.theultralighthiker.com/2019/09/07/60-diy-ultralight-hiker-ideas/
See also:
http://www.theultralighthiker.com/a-gorilla-in-the-bush/
http://www.theultralighthiker.com/fitting-your-backpack/
http://www.theultralighthiker.com/ultralight-hunting-daypack-update/
http://www.theultralighthiker.com/hunting-daypack/
http://www.theultralighthiker.com/ultralight-pack/
http://www.theultralighthiker.com/the-ideal-pack/
http://www.theultralighthiker.com/air-beam-pad/
http://www.theultralighthiker.com/klymit-air-beam-inflatable-pack-frame-update/

Thank you for making a blog with a lot of information and tips. I will definitely use some of these tips.
Glad you are enjoying it Fred. Cheers, Steve.
You might like the following if you haven’t seen it yet: “Human Interface: a Guide to Backpack Harness Innovation” by CARRY HQ, March 12, 2020
Original at: https://www.carryology.com/liking/industry/human-interface-a-guide-to-backpack-harness-innovation/
And archived: https://web.archive.org/web/20200314185648/https://www.carryology.com/liking/industry/human-interface-a-guide-to-backpack-harness-innovation/
Wow! Thanks for that Dave. I had not seen it. I will read it tonight with considerable interest I imagine. Cheers, Steve.