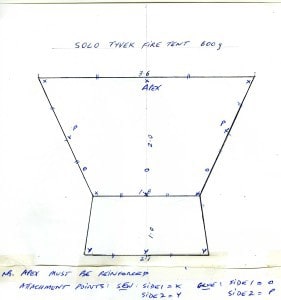
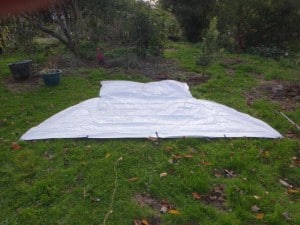
It weighs less than 600 grams. Here is my plan for an excellent one person shelter which will keep you safe from just about everything and can be warmed by a cheery fire out the front. You can cut it in one piece (as shown) from a single sheet of 3 metre wide Tyvek ‘Homewrap’ 3.6 metres long costing about $20. Leave about 2cm more for a hem, which you can tape with Tyvek tape. You can add reinforcing patches to the corners, etc in the same way – or you can learn to sew! If you can’t sew hems & webbing tie outs as shown, you can erect it with tarp clips (eg http://www.shelter-systems.com/gripclips/) You could use these stick on loops (http://www.zpacks.com/large_image.shtml?accessories/tape/stick_on_loop_clear_l.jpg) as bottom tie outs or to erect a bathtub floor, attach your raincoat to close the top half of the opening in bad rain, etc One might be good about 30 cm from the ground to hold out the centre of the windward side in strong winds so the material doesn’t press up against you, and at the windward corners. These Velcro strips might be handy too http://www.zpacks.com/large_image.shtml?materials/velcro_l.jpg & etc.
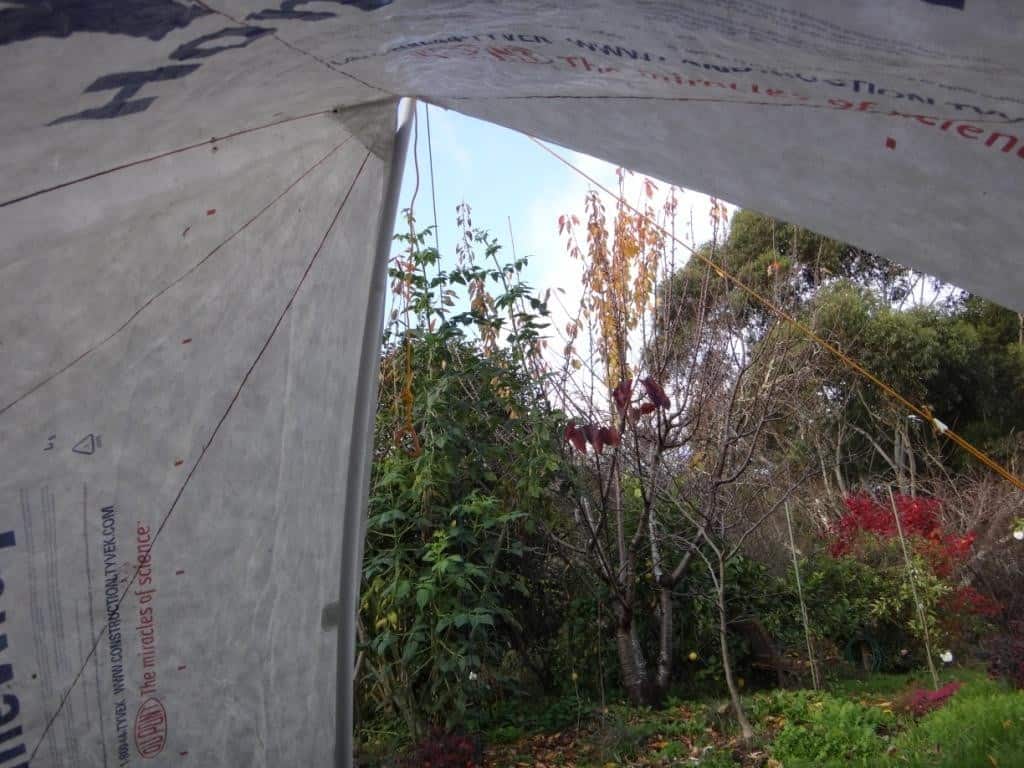
There is clearly plenty of room for one person, lots of gear and a dog or two! I guess two people would fit if you are very good friends, and if you extend the floor forward by about 30cm (join needed – you can use tape). Such a shelter is much better than a tent or bivy bag especially on wet days. You have somewhere warm and comfortable to retreat to, but with a view. You can cook under cover as Tyvek has a high melting point. It will also withstand 160 Km per hour winds and keeps in the warmth wonderfully.
Update 12/11/2015: I have used this shelter many times and found it excellent. I have added a bit more width to the floor (about a foot in the centre) so that when I am sitting on my Cyclone Chair (http://www.theultralighthiker.com/cyclone-chair/) my head is not touching the roof. This would also now make for enough room so two can lie down. If you wanted a little more room for two I would add two more triangles starting at the centre of the plan below and tapering to be about 2’6″- 3′ at the outside edge. When erected these will give an extra 18″-2′ inside the completely closed shelter. I am also thinking about a ‘hood’ at the top so that when it is completely closed no rain can enter, but air can exit. As with many of my plans, I will promise to post them later… The shelter will still only weigh about 800 grams! PS: If you can’t access Tyvek ‘Homewrap’ you can make this out of an @ 10′ x 12′ blue poly tarp. See: http://www.theultralighthiker.com/poly-tent-by-the-ultralight-hiker-on-the-cheap/. If you can’t sew your own webbing tie-outs, you can use tarp clips (as above) or this: http://www.theultralighthiker.com/worlds-lightest-tarp-clip/ PS: Tape won’t stick to the blue poly.
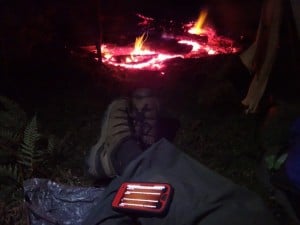
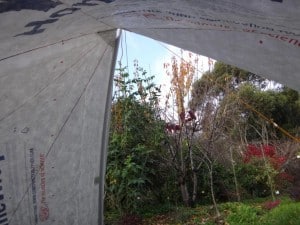
You will never have a cold back as it will reflect the heat from the fire right back at you, and keep you warm all around. I have been sitting in mine in shirtsleeves on sleety nights when the mercury dropped below 0C. I have also been out in it in torrential rain and hideous winds. Most places (except the tops of hills – never a good place to camp) the wind blows pretty consistently from one direction – check the forecast before you go. If it does turn around you can close in the storm flaps. If it turns 180 degrees, you may have to re-erect it, but closing just one of the storm flaps may allow the wind to just scoot by instead of funnelling the smoke into the tent. You just tie it to a tree, any stick over about 1.5 metres, two hiking poles joined together & etc. You (at least) need 8 stakes (including two for the storm flaps). Take 9 – one can always go missing. You can certainly scale this up to suit two people, but you will have to sew the wider floor on if you make it wider eg the top piece might be 2.4 metres high and 4 metres wide and the floor perhaps 1.5 metres wide. In that case you would need 5.5 metres of 3 metre wide Tyvek. I WILL expand on this later after I have done some more experimenting. See also: http://www.theultralighthiker.com/tyvek-twin-fire-shelter/ Hang in there…Della Jones’s winter garden looking lush in the background of the photos…
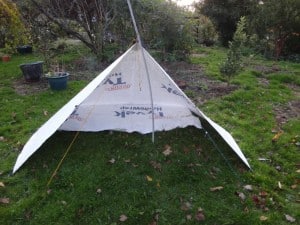
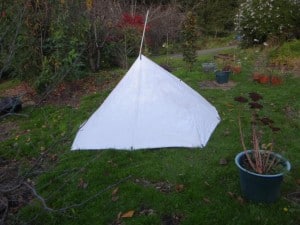
Did you click on the ‘Plan Approximate Dimensions Photo’ photo to open it? You should be able to read the dimensions (in metres) then. I have updated this photo and marked points to sew/glue tie outs to. I think the outside windward two tie outs should be up from the edge maybe 50mm so that the tent tensions better on uneven ground. This would require two short guys. I have just glued three more about 30 cm up to the back which makes it stand up better into the wind. And am sewing another two on the front flaps (so I can peg it to the ground when closed), and on the ends (and centre) of the floor – as well as gluing two to the inside so I can hook the floor up to the walls and the pole. I am pleased that when I pitch the shelter to @ a 5′ pole, the two guy ropes then needed meet the ground almost exactly at the end of the two front flaps (when open), so there is nothing to trip over. I use luminous micro cord locks and 2mm spectra. Two close friends could use the shelter as it has a 4′ floor. My dog and I kept very warm in it on the a trip recently: http://www.theultralighthiker.com/spots-hunting-adventures-1-mystery-river/
PS: If you leave out the floor you will save approx 160 grams which you can substitute a 7 x 5 silnylon poncho for, so that for your 600 grams you will have a tent AND a raincoat! See: http://www.theultralighthiker.com/hole-less-ponchoshelter/
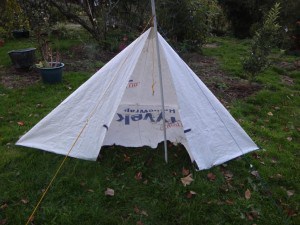
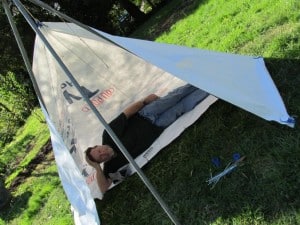
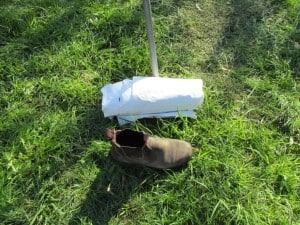
PS: I have since redeveloped this tent to this excellent accommodation http://www.theultralighthiker.com/the-deer-hunters-tent/:
As usual, make one of these for your own use but if you want to manufacture them, I would like some credit – and some cash, please!
First Published on: May 23, 2015
See also:
http://www.theultralighthiker.com/poly-tent-by-the-ultralight-hiker-on-the-cheap/
http://www.theultralighthiker.com/tyvek-solo-fire-shelter/
http://www.theultralighthiker.com/tyvek-tent-designs/
http://www.theultralighthiker.com/tyvek-twin-fire-shelter/
http://www.theultralighthiker.com/one-pole-tyvek-tipi/
http://www.theultralighthiker.com/tyvek-bivi/
http://www.theultralighthiker.com/new-tyvek-forestertent-design/
http://www.theultralighthiker.com/tyvek-jack-russell-rain-coat-13-grams/
http://www.theultralighthiker.com/catenary-curves/
http://www.theultralighthiker.com/ultralight-chairgrounsheet/
Some Other Hunting Related Posts (there are many more):
Adventures:
http://www.theultralighthiker.com/does-spot-like-to-hunt-deer/
http://www.theultralighthiker.com/sambar-stalking-101/
http://www.theultralighthiker.com/does-spot-like-to-hunt-deer/
http://www.theultralighthiker.com/spots-hunting-adventures-1-mystery-river/
http://www.theultralighthiker.com/not-quite-alone-in-the-wilderness/
http://www.theultralighthiker.com/hunting-in-fiordland/
http://www.theultralighthiker.com/moose-hunting/
Survival:
http://www.theultralighthiker.com/finding-your-way/
http://www.theultralighthiker.com/how-to-light-a-fire-in-the-wet/
http://www.theultralighthiker.com/carry-a-knife/
http://www.theultralighthiker.com/how-to-treat-a-gunshot-wound-part-2/
http://www.theultralighthiker.com/how-to-avoid-being-wet-cold-while-camping/
http://www.theultralighthiker.com/river-crossings/
http://www.theultralighthiker.com/river-crossings-2/
http://www.theultralighthiker.com/emergency-dial-112/
http://www.theultralighthiker.com/rope-dont-leave-home-without-it/
http://www.theultralighthiker.com/home-made-pack-raft/
Feet:
http://www.theultralighthiker.com/784/
http://www.theultralighthiker.com/spare-shoes-great-for-river-crossings/
http://www.theultralighthiker.com/keen-shoes/
http://www.theultralighthiker.com/why-you-should-get-your-feet-wet-when-hiking/
http://www.theultralighthiker.com/foot-care/
http://www.theultralighthiker.com/ultralight-mitts-and-gaiters/
Tips:
http://www.theultralighthiker.com/ultralight-personal-hygiene/
http://www.theultralighthiker.com/insects-can-ruin-a-camping-trip/
http://www.theultralighthiker.com/leeches/
http://www.theultralighthiker.com/pack-weight-reduction-tips/
http://www.theultralighthiker.com/securing-hearing-aids/
Equipment:
http://www.theultralighthiker.com/308s/
http://www.theultralighthiker.com/bore-sight/
http://www.theultralighthiker.com/camera-clearviewers/
http://www.theultralighthiker.com/the-worlds-greatest-machete/
http://www.theultralighthiker.com/improvised-bow-saw/
http://www.theultralighthiker.com/lever-actions/
http://www.theultralighthiker.com/blr-lightning-rifle/
http://www.theultralighthiker.com/never-have-to-sharpen-your-knife-again/
Shelter:
http://www.theultralighthiker.com/the-deer-hunters-tent/
http://www.theultralighthiker.com/hammocks/
http://www.theultralighthiker.com/hammock-camping/
http://www.theultralighthiker.com/worlds-lightest-tarp-clip/
http://www.theultralighthiker.com/the-perfect-guy-line-for-a-hiking-tenttarp/
http://www.theultralighthiker.com/tent-stakes-and-tricks/
Hiking Gear:
http://www.theultralighthiker.com/dry-bags-sea-to-summit-ultra-sil-nano/
http://www.theultralighthiker.com/bush-shower-mechanical-advantage/
Comfort:
http://www.theultralighthiker.com/cyclone-chair/
http://www.theultralighthiker.com/best-sleeping-bag/
http://www.theultralighthiker.com/air-beam-pad/
http://www.theultralighthiker.com/ul-pillows/
http://www.theultralighthiker.com/new-hiking-mat-425g/
Dogs:
http://www.theultralighthiker.com/tyvek-jack-russell-rain-coat-13-grams/
http://www.theultralighthiker.com/ultra-light-dog-leash/
Packs:
http://www.theultralighthiker.com/the-ideal-pack/
http://www.theultralighthiker.com/ultralight-pack/
http://www.theultralighthiker.com/hunting-daypack/
http://www.theultralighthiker.com/ultralight-hunting-daypack-update/
Clothes:
http://www.theultralighthiker.com/hiking-pants/
http://www.theultralighthiker.com/rain-kilt/
http://www.theultralighthiker.com/new-cuban-fibre-raincoat/
Hunting/Fishing:
http://www.theultralighthiker.com/how-to-make-a-sling/
http://www.theultralighthiker.com/four-gram-fishing-handlines/
http://www.theultralighthiker.com/solunar-tables/
Cooking:
http://www.theultralighthiker.com/cookset-woes/
http://www.theultralighthiker.com/supercat-hiking-stove/
http://www.theultralighthiker.com/windscreens/
Food:
http://www.theultralighthiker.com/emergency-cb-radios/
http://www.theultralighthiker.com/tasty-hiking-meals/
http://www.theultralighthiker.com/dellas-coconut-rice-hiking-food/
http://www.theultralighthiker.com/lunch-on-the-trail/
http://www.theultralighthiker.com/hiking-food-2/
Water:
http://www.theultralighthiker.com/survival-still/
http://www.theultralighthiker.com/water-hiking-desalinator/
http://www.theultralighthiker.com/water-filter/
Thoughts:
http://www.theultralighthiker.com/free-willdeterminism/
http://www.theultralighthiker.com/you-will-not-live-forever/
4WD:
http://www.theultralighthiker.com/second-air-bead-locks/
http://www.theultralighthiker.com/twin-shock-absorbers/
http://www.theultralighthiker.com/enginesaver-low-engine-water-alarm/
Electronics:
http://www.theultralighthiker.com/mobile-phone-battery-life/
http://www.theultralighthiker.com/get-lost-get-found-plbepirb/
http://www.theultralighthiker.com/mobile-phone-antennae/
http://www.theultralighthiker.com/gotenna/
http://www.theultralighthiker.com/mobile-phones-apps-for-bushwalking/
http://www.theultralighthiker.com/mini-super-torch-a-weeks-light-weighs-50-grams/
http://www.theultralighthiker.com/single-aaa-head-torch/
http://www.theultralighthiker.com/eneloops-rechargeable-batteries/

Do not cook!
The melting point of Tyvek® is 275°F (135°C). During web handling operations, the web
tension should not exceed 0.75 lb/in (1.4 N/cm) width and the sheet temperature should not
exceed 175°F (79°C).
http://www.fibermark.com/sites/default/files/FMK_DuPontTyvekUsersManual_0.pdf
I think that is Tyvek paper. Tyvek Homewrap does not burn till 400C. I would not want to be in the shelter over about 25C – but you are right with the advice to be careful: http://www.dupont.com/content/dam/assets/products-and-services/construction-materials/assets/SPEC-31%20-%20Physical%20Properties%20Data%20Sheet-%20DuPont%20Tyvek%20HomeWrap.pdf
Hi, Thanks for putting up your series of “tent/shelter designs”. One is definitely on the cards I just need to work out which one. I do like the idea of a campfire to warm. Tyvek sounded pretty good but the bright white was a bit of put off for me so I went searching for ways to dye/print on it. While doing this I cam across a document called the Dupont Tyvek Users Manual. In there it lists the melting point as 135C and auto ignition point as 400C. Hopefully a link to the document is attached in case you want to read it. I’m still going to make one of the tent/shelters.
https://www.google.com.au/url?sa=t&rct=j&q=&esrc=s&source=web&cd=1&cad=rja&uact=8&ved=0ahUKEwil8-PD7pXOAhWBFpQKHf6sDiIQFggdMAA&url=http%3A%2F%2Fwww2.dupont.com%2FTyvek_Envelopes%2Fen_US%2Fassets%2Fdownloads%2FDuPont_Tyvek_Users_Guide.pdf&usg=AFQjCNFeHWzzOOh1WnQ47F869io3-0WJVQ&sig2=hJcoOazKF3XJfD3CXhTmnA
Thanks Steve. Not quites so fire resistant as I thought. I must have confused Celsius and Fahrenheit and the melting point with the ignition point. I find sparks from the fire just roll of it without leaving a mark. I have tried lighting it with a cigarette lighter. It melts away from th flame rather than going up with a whoosh. I’m sure it is more fire resistant than silnylon or canvas though. I always have my fire well out the front – and of course on the lee side. You always have to be careful with fire, but it sure beats being cold and wet which is the alternative after all! Cheers, Steve.
Where is the best place to source the Tyvek?
Can’t find hardly any local places to buy it (by the metre).
I bought rolls from Bensons Hardware in Morwell. You could ring them for a price on a 3 metre roll, then use their price to order it from your local Bunnings at 10% less. You would have to buy a whole roll for $150-180 most likely. This would be enough to make at least half a dozen tents of various configurations including the tipi. I WILL be posting the plans of all (4-5) of them (next week) if I have time. Perhaps a local builder uses it? They should! It is MUCH better than the usual silver paper wrap most use.